

Mac Mini 2014 Ssd Upgrade Kit
The definitive guide
The Apple tree Mac Mini has a loyal fan grouping around the world. They are a hackers delight, in the true sense of the word. Hacking to make them more functional.
Whatever your use of the Mac Mini, be it media server or desktop calculator, the one upgrade that will make the biggest impact is a SSD.
There are many options in upgrading a Mac Mini, and that is why nosotros have created this guide. Everything we know, in one place, to help you the community go the most of your Mac Mini.
It is a free download if y'all want to salve it to read later. Nosotros appreciate all feedback and additional information. In a way, we practice rely on you the Mac Mini user to give us additional information. That will be added here, and shared with anybody else.
Don't forget to like and share if all this information has been helpful, that would be crawly...buying ane of our SSDs would be fifty-fifty better :-)

Introduction
Normally nosotros start these guides with why an SSD is fast, and why it volition change your life. All Mac Mini users know this, they are apply to sqeezing the most out of their machine to be more productive.
When ordering from Upgradeable, it is important to let use know you are upgrading a Mac Mini. Type your model number in the client notes at checkout. This helps usa provide you with all the right tools.
The way nosotros construction these guides is by using our "4 R method". It is named this manner considering each footstep starts with the alphabetic character R.
Supervene upon, RESTART, Gear up and RESTORE.
The idea is to present all the different ways to upgrade your Mini in a methodical and easy to remember format. If you demand more detailed data or need assist planning an upgrade, then please use our awesome client service squad. Yes, they answer the telephone, like to be challenged with hard questions, and don't listen answering the easy ones besides. In that location are no silly questions at Upgradeable, nosotros are happy to help, even if it is just to make sure you are ordering the right product.
Chapters
Four R method: Time Automobile
The easiest way to upgrade to a new SSD is to utilize Fourth dimension Machine. All yous need are tools and the SSD! You can either restore a whole back upward, which includes macOS or yous tin drift using the Time Car after installing a new macOS.
i
REPLACE
Remove your old hard bulldoze, and install SSD. We provide detailed printed instructions when yous order an SSD, just include your Mac Mini model in the notes at checkout.
2
RESTART
Plug Time Machine into the USB port. If you have a wifi time sheathing make sure it is turned on. Restart your Mac holding down the Command and R keys (this is Recovery Style). The Mac volition use the Time Automobile to build the Bone Utilities page.
3
Prepare
As the bulldoze is shipped to you unformatted, you need to initialise the SSD to get information technology set for the transfer of data. There is an option afterward you click into Time Motorcar chosen Deejay Utility. You need to choose format type (must utilise APFS for Mojave or High Sierra, earlier versions apply mac extended journaled) and a name, yous tin use Macintosh SSD or get creative and give it a person'southward proper name similar MiniMouse. Click apply and this volition format the SSD.
4
RESTORE
After formatting the bulldoze your Fourth dimension Machine back ups should exist onscreen. Choose the latest, and the Mac will ask if you lot want to restore back up? Yes. Done. Fourth dimension Machine will now start restoring onto the new SSD. It will accept a while, approximately 100gb per hr.
Software and tools you need
The dandy thing near a Time Machine restore is you merely need the SSD and tools to open up the Macbook Pro.
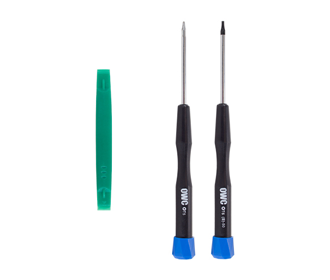
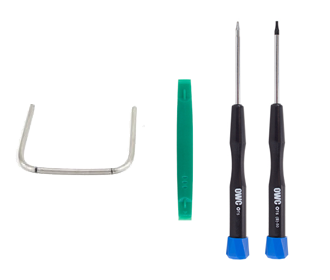
• Screwdrivers (Phillips #00, Torx T6 and Spudger)
• Choose an SSD drive hither
• Don't have a Fourth dimension Machine backup? Read the Apple tree guide on Time Machine backups
Iv R method: Cloning (2006-2014)
These are instructions for 2006 to 2014 Mac Mini .
Cloning allows you lot to brand an exact copy of current hard drive to the new the SSD. The benefit is software does not have to exist reinstalled.
The process is largely automatic and the cloning takes ii-5 hours depending on the size of your drive.

one
Set up
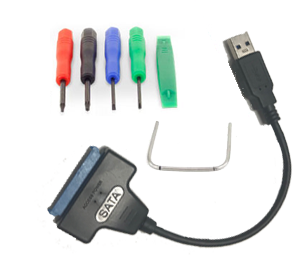
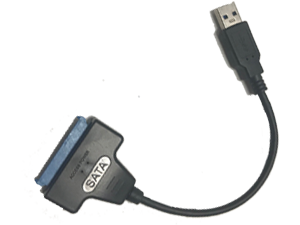
Connect the SSD to a spare USB port using a USB to SATA cloning cablevision (sold separately).
two
RESTART
Restart your Mac
Do not allow macOS to turn information technology into a Fourth dimension Machine drive.
iii
RESTORE
Download and Install Carbon Re-create Cloner software (xxx twenty-four hour period free trial software link is below in the greenish box). As the drive is shipped to you lot unformatted, you demand to initialise the SSD to get it ready for the cloning by initialising the SSD. Clone your difficult bulldoze using Carbon Copy Cloner.
4
Supercede
When cloning is complete, power off your Mac and supercede the hard drive with the newly cloned SSD. We ship detailed printed instructions with your SSD order
Software and tools you lot need
Cloning is an excellent manner to apace copy your current drive onto a new SSD. Yous just need a cloning cablevision, SSD and tools to open the Macbook Pro.
• Screwdrivers (Phillips #00, Torx T6 and Spudger)
• USB to SATA cablevision (needed to connect the new SSD to your Macbook's USB)
• Carbon Copy Cloner download by Bombich (30 day trial).
• SuperDuper! software by Shirt Pocket (gratis download).
• Choose an SSD drive here
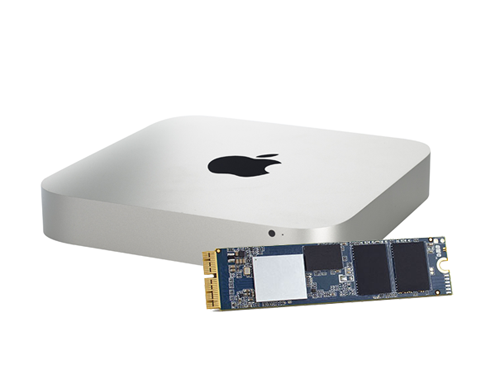
Four R method: Cloning blade SSD (2014)
The 2014 Mac Mini shipped a Chiliad.ii blade option for storage. The M.two is a proprietary bulldoze, which ways yous cannot utilise a standard NVME bulldoze similar the Samsung 970 EVO. The OWC Aura Pro X2 is a compatible SSD, all the same your Mac Mini must be on macOS High Sierra or to a higher place and the SSD formatted as APFS.
This method uses OWC Aura X2 with Envoy Pro and Internet Recovery to clone. If your Mac is pre 2010 then you volition need a macOS installer USB (run across notation below on how to make one).
1
Supercede
Ability off your Mac and replace the original Apple SSD with the new
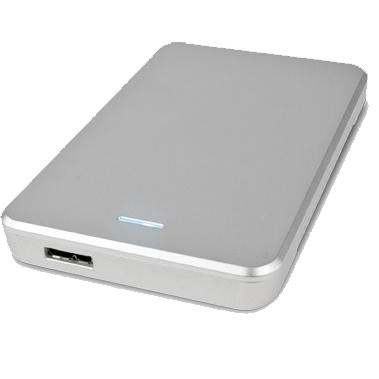
Aura X2 SSD. Install the Apple SSD into the OWC Envoy external case.
ii
RESTART
Plug Envoy into USB. Restart your Mac property down the Control and R keys (this is Recovery Mode). The Mac will build the OS Utilities folio.
3
Gear up
Go to Disk Utilities and initialise the SSD. Must be initialised as APFS format.
4
RESTORE
In the left mitt window pane of Disk Utilities select the new Aureola X2. Click on Restore button on height bill of fare. A popular upwardly window will ask for "Restore from:" Select your original SSD that is in the Envoy case. Disk Utilities will now clone your old SSD onto the new Aura X2.
Software and tools you need
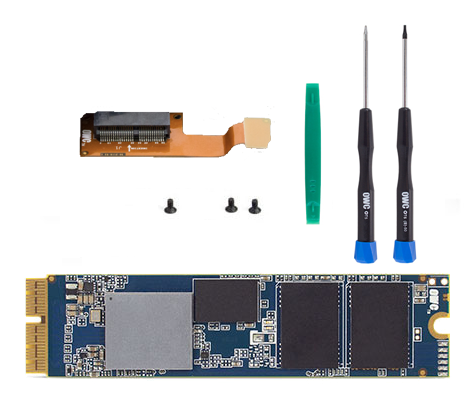
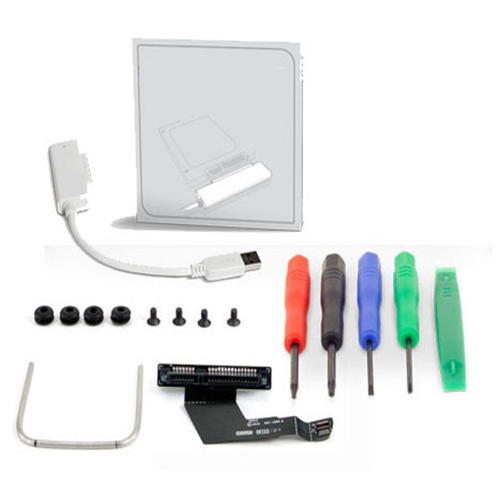
Our SSD KITS for the 2014 model includes everything you need to clone.
Kit includes SSD, printed instructions, and tools.
• Choose an SSD bulldoze here
Four R method: Fresh macOS

Sometimes a Mac needs a fresh start. Apple tree makes it piece of cake to reinstall macOS.
MacOS tin can be installed via Recovery Mode or via a macOS USB. We have previously recommended USB installers merely Apple has updated and improved Recovery install. Restarting the Mac holding down Command - R will give you the OS previously installed. More detailed info is in our How to install macOS section.
1
READY
This method takes a little scrap of planning. OSX or macOS (as it is at present called) tin exist installed on an empty SSD via Recovery Mode or installing off media such as a USB. If you are installing from USB, you lot need to brand that macOS USB before you commencement. Recovery Mode is installing the macOS from a Time Machine or a Mac bulldoze recovery partition or Internet Recovery.
ii
RESTART
Close down your Mac.
3
Supplant
Supersede the hard bulldoze (HDD) with the new SSD (reuse any mounting screws and brackets).
four
RESTORE
If yous are installing macOS from USB, then insert macOS USB, hold down selection cardinal and restart Mac. If you are using Recovery way, plug in your Time Machine or Mac drive (yous dont need them if y'all take internet), restart the Mac property downward the Command + R keys. The Mac volition create the macOS Utilities page that has options such as Deejay Utility and install a new macOS. Whichever method you cull, the new SSD first has to be initialised (erased) first via Deejay Utility. Run across How to install a macOS for detailed information
Software and tools you need
There are many options when starting fresh. You can install the current version of macOS or a subsequently version that is more uniform with your apps and programs. You can put the latest macOS on your new SSD then use the Migration Assistant to copy over data and programs. You lot do not accept to connect to some other Mac, you can connect to a Time Machine or external startup deejay to transfer files!
• Screwdrivers (Phillips #00, Torx T6 and Spudger)
• Familiar with how to Internet Recovery macOS or have an macOS USB drive.
• Choose an SSD drive here
The Upgradeable Squad is here to help. If you lot desire communication or check with an expert, please telephone call, chat or email.
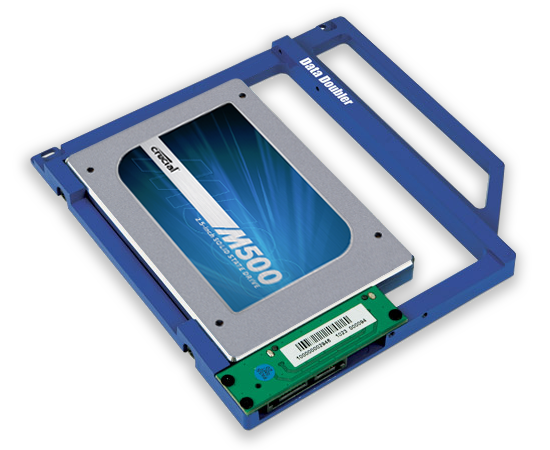
2d drive in DVD Bay (2009-x)
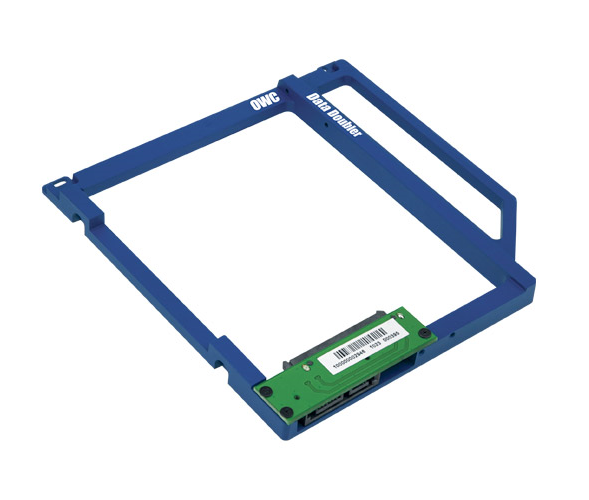
The 2009 and 2010 Mac Minis (not server version) can accept two drives by replacing the optical bulldoze with a Datadoubler subclass. Turn your Mac Mini into the server version. At that place are a lot of uses for a two bulldoze Mac Mini: RAID the two drives, utilize the second drive as extra storage or a Time Machine. Please sentry installation videos start to make sure you lot are comfortable practise a complicated install. Alternatively, Upgradeable offers an instore installation service.
i
Physical installations
Fit the new bulldoze on the Datadoubler subclass. Remove optical drive (DVD) and replace with the Datadoubler. (total printed instructions are included with order). We recommend watching installation videos outset. Y'all should now accept two drives: your erstwhile hard drive and the new SSD in the optical bay.
two
Restart your Mac
Power on your Mac Mini holding down the pick primal (this starts the kicking manager and shows all drive you tin kicking from). Your sometime hard drive should appear onscreen as a device to boot from. Select and start up macOS.
When the Mac starts up, exercise not let the system to apply the new SSD as a Fourth dimension Machine.
three
Initialise the new SSD
The new SSD needs to be initialised (formatted). Open Disk Utility (in applications), select the new SSD. Click on Erase. Requite the new drive a name such every bit "Macintosh SSD". Yous need to cull format type (unremarkably Extended Journaled). Next option is Scheme (if available): Choose GUID Segmentation Map. Erase. The bulldoze is at present set to be used.
iv
How are you restoring macOS?
Volition you be cloning your onetime drive onto the new SSD? Or using internet recovery or a macOS USB to install a fresh install of macOS. If yous are cloning, install SuperDuper! software and clone your hard drive (in optical bay) to new SSD. If y'all are putting a fresh version of macOS on the new SSD follow the instructions listed in the Four R method: Fresh macOS
v
Two bootable drives
At that place are now two bootable drives, you need to make sure macOS uses the correct one! In StartUp Disk (in system preferences) choose the new SSD equally the drive the system uses to restart the Mac.
It is a practiced idea to use the new SSD for a while. Make sure everything is ok. If you do not demand the 2nd drive equally a fill-in and the new SSD is working perfectly you can erase the original bulldoze in Deejay Utility. The 2nd drive can be apply as a Time Machine for back ups or employ equally internal storage.
Software and tools you need
This upgrade is complicated, then nosotros provide printed illustrated guides and costless phone tech support if you need help.
• Information Doubler subclass for Mac optical bay
• SuperDuper! software by Shirt Pocket (costless download). Or familiar with how to Internet Recovery macOS or take a macOS USB drive.
• Cull an SSD drive hither
The Upgradeable Squad is here to help. If you want advice or bank check with an adept, please call, chat or e-mail.
Second drive in 2011-12 models

The 2011 and 2012 (non server) Mac Mini models Mac Minis can accept a 2d drive installed. Upgradeable sell a kit that includes all the tools, accessories and cables yous need. Delight watch installation videos first to make sure yous are comfortable with this complicated install. Alternatively, Upgradeable offers an instore installation service. Alert: some 2012 models shipped from Apple with the original bulldoze in the upper bay not the usual lower bay. One of our steps below bear witness you how to check. Information technology is non a big outcome, the same cable is used but in a unlike way.
1
Cheque location
To bank check the drives location, open Disk Utility and click on the grey drive icon at the left edge of the window. Click the "Info" button on the toolbar. A window will open. Scroll to the "Location" detail; if you lot encounter "Lower" Exercise a standard installation. If information technology lists "Upper" and so watch this install video and you will demand a pocket-sized wrench.
2
Physical installations
Fit the new bulldoze in the lower or upper bay (which ever is empty, should be "upper").
Full printed instructions are included with guild.
We recommend watching the installation videos first.
You should now take two drives installed.
three
Restart your Mac
Power on your Mac Mini property down the choice key (this starts the boot director and shows all drive you tin can boot from). Your old difficult drive should announced onscreen every bit a device to boot from. Select and offset up macOS. If neither drive has an Bone, so plug in a MacOS USB installer before restart.
iv
Initialise the new SSD
The new SSD needs to be initialised (formatted). Open Deejay Utility (in applications), select the new SSD. Click on Erase. Give the new drive a proper name such as "Macintosh SSD". You need to choose format type (must utilize APFS for Mojave or High Sierra, earlier versions use Extended Journaled). Adjacent option is Scheme (if bachelor): Choose GUID Partition Map. Erase. The drive is at present ready to be used.
5
How are yous restoring macOS?
Will yous be cloning your erstwhile bulldoze onto the new SSD? Or using net recovery or a macOS USB to install a fresh install of macOS. If you are cloning, install SuperDuper! software and clone your hard drive (in optical bay) to new SSD. If you are putting a fresh version of macOS on the new SSD follow the instructions listed in the Four R method: Fresh macOS
6
Two bootable drives
There are now two bootable drives, you need to brand certain macOS uses the right i! In StartUp Disk (in organization preferences) choose the new SSD as the bulldoze the organization uses to restart the Mac.
It is a expert idea to use the new SSD for a while. Brand certain everything is ok. If you do not need the 2nd drive as a backup and the new SSD is working perfectly yous can erase the original bulldoze in Deejay Utility. The 2nd drive can be apply as a Time Machine for back ups or apply every bit internal storage.
Software and tools you need
This upgrade is complicated, and then we provide printed illustrated guides and free phone tech support if yous need assistance.
• 2nd drive kit for 2011 and 2012 Mac Mini
• SuperDuper! software past Shirt Pocket (costless download). Or familiar with how to Cyberspace Recovery macOS or have a macOS USB bulldoze.
• Choose an SSD bulldoze here
The Upgradeable Team is here to help. If you lot want advice or bank check with an expert, please telephone call, conversation or email.
SSD options for the 2014 Mac Mini
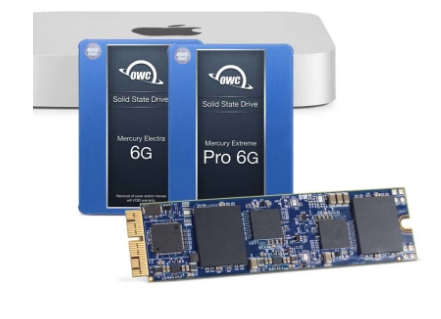
The 2014 model could be configured from the Apple tree manufacturing plant with THREE dissimilar storage options.
1. SSD = m.2 PCIe blade
2. SATA drive = 2.5 inch SATA hard drive
iii. Fusion drive = both a PCIe SSD and SATA drive installed.
Upgradeable sells kits that can add a 2d bulldoze to both selection 1. and 2.
1
M.2 PCIe SSD 2014 Mac Mini
Y'all can supervene upon your SSD with a larger faster Aura X2. You can non add two PCIe SSD blades. If you want a second drive, there is a SATA port on the motherboard. We sell a kit that includes tools and cable required to add a SATA SSD in the empty SATA bulldoze bay.
2
SATA hard bulldoze 2014 Mac Mini
You can supplant your SATA drive with a faster 2.5 inch SATA SSD. There is no room in the model for two SATA drives equally in previous models. To add a second drive you must add a PCIe cable. There is a free PCIe port on the motherboard. Upgradeable sells a kit (see the dark-green box below) that includes tools and cable required to add a PCIe SSD (Aureola Pro X2) to your Mac Mini.
iii
Fusion Drive 2014 Mac Mini
If your Mac Mini 2014 shipped from Apple tree with a fusion drive, then your Mac Mini has both the SATA and the PCIe connector. You can replace the SATA bulldoze with a 2.5 inch SSD and y'all tin can replace the original Apple SSD with a faster Aura Pro X2 NVMe SSD.
Software and tools you need

Exercise you want to salve all this info to use later?
We have created a PDF for you lot to read at someday
Download the PDF!
Cull an SSD for your Mac Mini
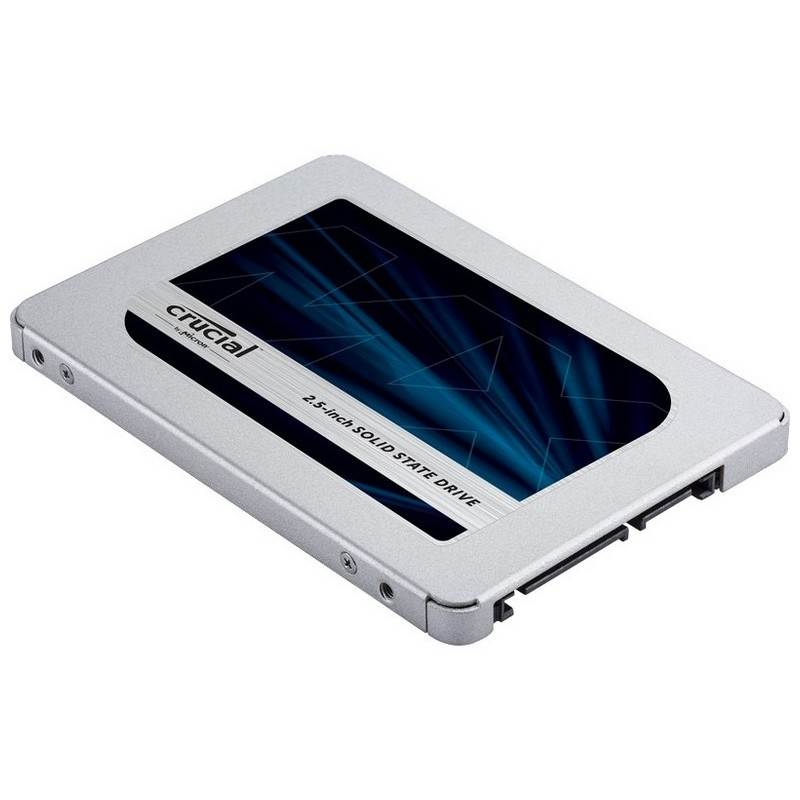
These SSD drives are a standard 2.5 inch SATA drive, compatible with the 2005 to 2012 Mac Mini range.
The 2014 model also had a SATA pick, please encounter our notes on upgrading.


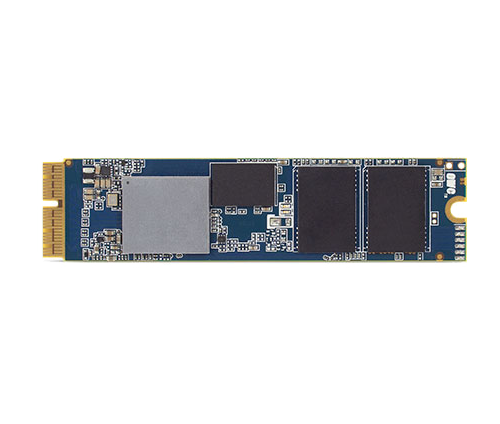
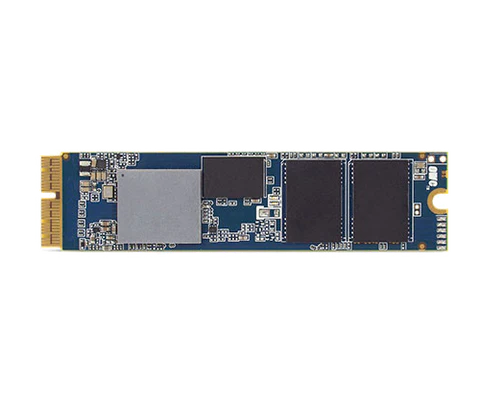
2014 Mac Mini NVMe SSD drives
In the 2014 model Mac Mini, Apple inverse the SSD they used to a proprietary Grand.two drive.
Proprietary here means an industry standard NVME drive is not compatible. OWC take created a third party SSD that is fully uniform and twice as fast as the original SSD.


Add a second drive kit for your Mac Mini 2014


Let us practice all the work!
Not everyone wants to do their own installation. We offer an installation service at our Sydney Pymble office. An Apple qualified technician does all our hardware and software piece of work. We match Crucial's warranty, so our labour warranty is as well iii years. This means if you have to merits your Crucial warranty, nosotros volition not charge a 2nd installation fee!
How can I get my new SSD installed?
Below we have a full range of SSD drives with installation included. Simply choose the size you lot want, in that location are no hidden extras. The toll you see is the cost yous pay.
Accessories yous need for a DIY installation
These are the kits or parts y'all demand for a successful installation of your SSD. Add to your cart what you lot need with the SSD you have chosen. When checking out, don't forget to tell usa in the client notes which Macbook or Macbook pro you have, and we will include full printed instructions.


How to install macOS
Note: It appears Apple has removed the feature to get a new macOS via Internet Recovery. All cardinal commands at present install the original macOS that came with your Mac. For example; if you lot have an older Mac that shipped with Lion, so net recovery will install that version on your Mac. The only way to go a newer version of macOS is via macOS Utilities on Time Machine or a recovery partition on a Mac bulldoze (such as your old difficult drive).
From mid 2010-2011, most Macs shipped with part of the macOS embedded in the logic board. This allowed the Mac to do an Internet Recovery, go to the Apple website, download some software, and boot to the macOS Utilities page. From this page you could initialise a new bulldoze and install the latest macOS. Changes from the release of High Sierra mean that the merely macOS you can install via Internet Recovery is the version you have embedded on your logic board (the macOS that shipped with your Mac). We are yet testing different scenerios, if you take experienced something different, delight let us know.
Why is this an outcome?
From Sierra and High Sierra, Apple tree has a new drive format structure. When yous upgrade to High Sierra, Apple changes your drive format structure to APFS. Loftier Sierra will only reliably work on a drive formatted as APFS. To control how the latest macOS is installed, Apple has locked downwardly ways to install it. If yous net recover your macOS, you can non format your drive as APFS and yous can not install the latest macOS. To get the latest macOS you need a recovery partition created with i of the latest macOS (like High Sierra).
With the dramatics out of the way, there are various ways to install macOS on your Mac, Apple provides many options. This quick guide is designed to answer questions yous have and provide a bit of clarity on the dissimilar processes. This is based on our experience and is always being revised. If you can add to these guides, please contact us accordingly.
How to get the latest macOS on a new SSD?
If yous don't have a Time Car or a working mac drive with the latest macOS and then you lot but have one selection. You lot take to create a macOS USB drive.
If you have a Time Machine or a working Mac drive, you can kick off either device to start the macOS Utilities folio which gives yous the pick of Disk Utility (to initialise the new SSD) and also install a new macOS. That macOS volition be the version of macOS that is backed up on the Time Car or the macOS that created the recovery partition. So if your drive or Time Machine was created with Sierra, then that is the macOS y'all can download and install. You can not install High Sierra or Mojave. The latest macOS is only available via an upgrade path. So install Sierra, and so utilise App Store to upgrade to High Sierra or Mojave. To use Fourth dimension Machine restart your Mac while belongings down the option key. If you restart the Mac holding downwardly Command + R it could use an erstwhile recovery partition or Cyberspace Recovery. If you are using a recovery partition yous can restart the Mac holing down the option fundamental (recommended every bit you can encounter which drive it reboots from) or property downwardly Command + R.
Using your old drive to become a new macOS
Your current hard drive will most likely take a recovery segmentation. Plug your new SSD into the Mac using a USB-SATA cloning cable. Reboot the Mac holding downwardly keys Control (⌘)-R. This should make the Mac boot from the recovery partition. If a spinning globe of the world appears, then it is going to Apple website to install an older version of MacOS, so abolish that functioning or shut the Mac down via a hard power off (concord down power push). You demand to restart holding downward the option central, select the recovery partition on the drive that appear. What should happen is the Mac will build The "macOS Utilities" page giving you the choice of installing a new macOS (there are besides options to restore from Fourth dimension Auto and Deejay Utility).
Using your Time Machine to get a new macOS
Plug the Time Motorcar straight into your Mac. Agree down the option primal and reboot the Mac. Belongings down the selection key loads the kick manager and the Time Automobile drive should announced onscreen. Select the Time Machine and the macOS Utilities page should come onscreen. You volition have the option of installing a new macOS (at that place are likewise options to restore from Time Motorcar and Disk Utility).
If a spinning globe of the globe appears, then it is going to Apple website to install an older version of MacOS, so abolish that operation or shut the Mac downwards via a hard ability off (concur down power push button). Your Mac is not seeing the Fourth dimension Machine. Make sure at that place is a physical connection non wifi. Is the Fourth dimension Motorcar turned on? Try holding down keys Command (⌘)-R and restarting with the Time Automobile plugged in.
Options for older Macs
You lot can install MacOS via original Apple disks. Apple no longer makes MacOS disks, DVD, CD or concrete media. All MacOS software is delivered digitally. If you have original software media for an macOS like Snow Leopard you can install that software and so upgrade via the App Store to the current version. Use the current MacOS upgrade guide for more information.
If y'all are using Leopard, y'all demand to beginning purchase Snow Leopard OSX x.6 media from Apple to upgrade the MacOS digitally. You can buy from an Apple Store or calling Apple Support.
Mutual bug installing a new macOS
The Recovery Server Could Not Be Contacted This issue is nearly always caused by an wrong engagement on your Mac. If you lot have asunder the battery, the date could accept reset. Part of macOS Utilities is Final. Information technology is found every bit an selection in the top carte. Select Terminal. If you lot are continued to the internet then type:
ntpdate -u time.apple.com
This should update the time. If not, then use this manual method:
date 0201200019
which is February 1st 20:00 (or 8pm) 2019.
And then mmddhhmiyy
all two digits.
macOS High Sierra or Mojave is not available If you lot tin can not see the latest operating system in macOS Utilities and then you have booted off the wrong partition. Either in that location is an one-time partition on Fourth dimension Machine or on the Mac drive. This usually happens when the Mac is restarted using Recovery Style (command + R). Apple and most of the internet recommends this method, still information technology does not give you control over which partition the Mac recovers from. Property down the option primal and restarting the Mac goes into boot manager, and yous can see all the drives the Mac can boot from. Make sure yous cull the right one! If y'all are recovering using a Time Machine, do not select a recovery partition, select the external USB fourth dimension Machine.
Tin can not boot from Time Machine
From Bone X King of beasts v10.vii.3 or later, you can get-go up from your Time Machine disk. Concord down the Option fundamental as your Mac starts up. When you see the Startup Manager screen, cull "EFI Boot" as the startup disk. The system should create the macOS Ulitilies folio. From here yous tin utilize disk utilities to format a new SSD, you can restore from Fourth dimension Machine or install a new macOS from the Apple servers. If you lot can not boot from the Time Auto, it is certainly something to exercise with your EFI. We are nonetheless troubleshooting this, nosotros will accept a new department on EFI shortly. You tin can google macOS EFI update to see the issue some mac users are having. It appears Apple updates the EFI in the background during macOS updates. If it fails, there is no alert or notification. And so there are a lot of Macs with outdated EFI. If your EFI is current, we take non seen any issues with Loftier Sierra/Mojave or booting from Time Auto. If you are having bug installing Loftier Sierra or Mojave, delight check if your EFI is update.
USB Installer is corrupted
The fault message when installing OS X is "This copy of the install Bone X El Capitan application can't be verified. Information technology may have been corrupted or tampered with during downloading". This is a check Apple has introduced with organisation installation. They don't want onetime OS versions installed, better to motion everyone to new OS, and new hardware (buy a new mac). There is a simple piece of work around. Reset your system date to OS release engagement or close to Os release date and you can now install the OS.
If yous are in Bone Utilities, the top menu should take a drop downwards that has Terminal. Run final and then type this in:
For El Capitan install apply: date 1001200015 [enter]
You can check the appointment is now 2015 by typing: engagement [enter], it should now display: Oct 1st xx:00 (or 8pm) 2015. The engagement after El Capitan's release. You lot tin now install El Capitan without an mistake.
Dates for other systems are:
Yosemite: appointment 1017200014
Mavericks: date 1023200013
Loftier Sierra: date 1023200017
How to use Migration Assistant
Apple includes an awesome app called Migration Banana that we take used to help customers start over with a fresh macOS simply go along all their data and applications. Apple allows a lot of different installation and migration options. Nosotros will hash out the main ones here, but if this does not answer your migration question, please contact us for more than specific information near the upgrade yous are planning.
What is Migration Banana...why should I utilise information technology?
Migration Assistant allows you to transfer applications, settings and data from another Mac. macOS can see "another Mac" as your one-time hard bulldoze or a Time Machine back up. A mac can boot from an external bulldoze, for example, if you put your one-time hard bulldoze into an external enclosure, you can boot from it, and run that hard drive and it would be exactly the same every bit your old mac...considering it is!
If you just want a new macOS, start fresh with no legacy upgrade data, so you tin employ Migration Assistant to reinstall all your data and apps, and y'all will have the do good of a new macOS with all the apps and data from your old drive.
How to use Migration Assistant
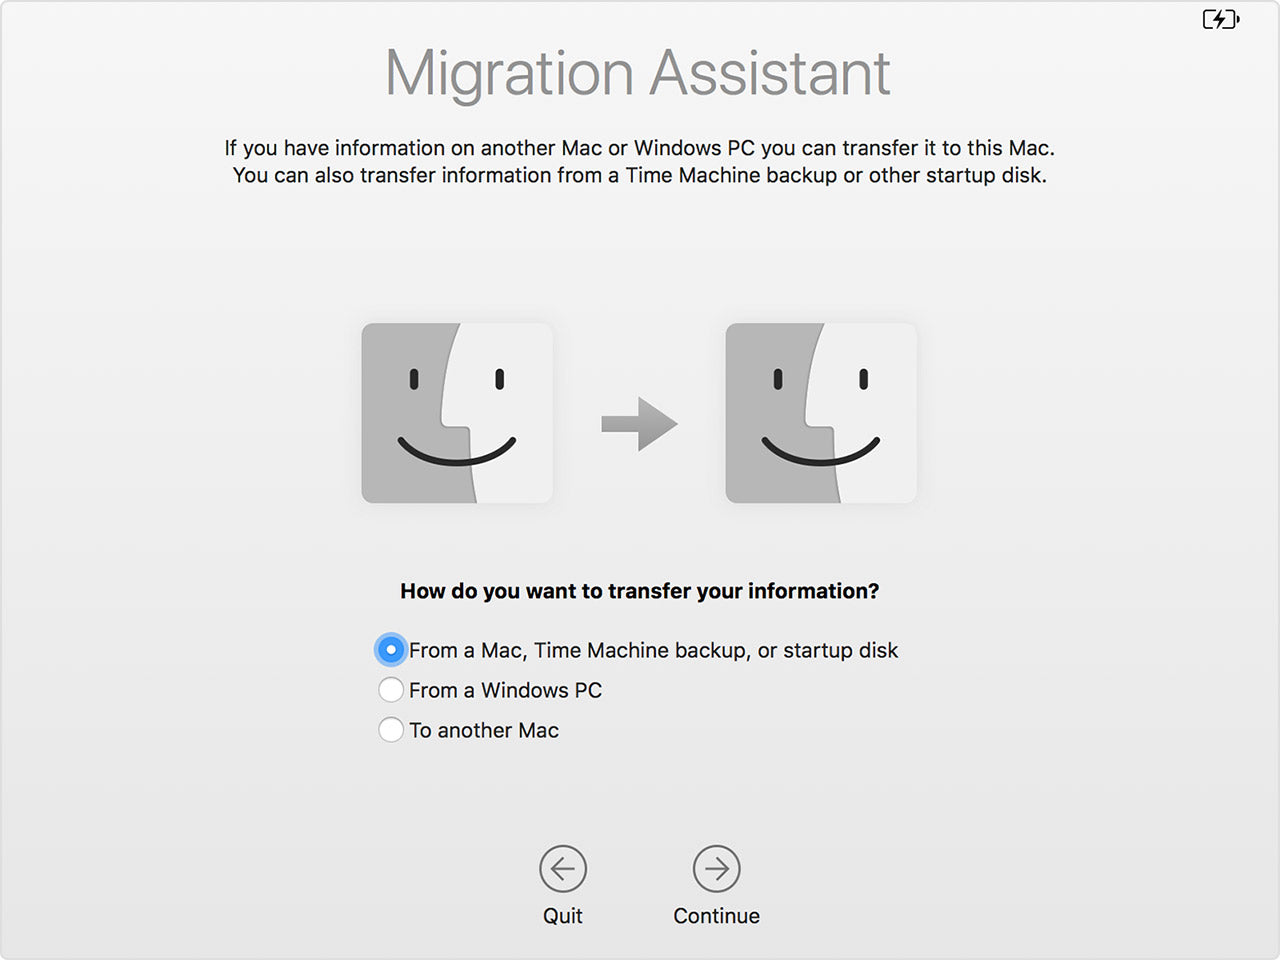
Afterward you have installed the new macOS, the system starts and asks for generic information: state, keyboard type etc. The next office of the installation setup is Migration Assistant.
If you have installed a new SSD, you can utilise either your old difficult bulldoze in an external enclosure or a Time Car support equally a source for Migration Assistant.
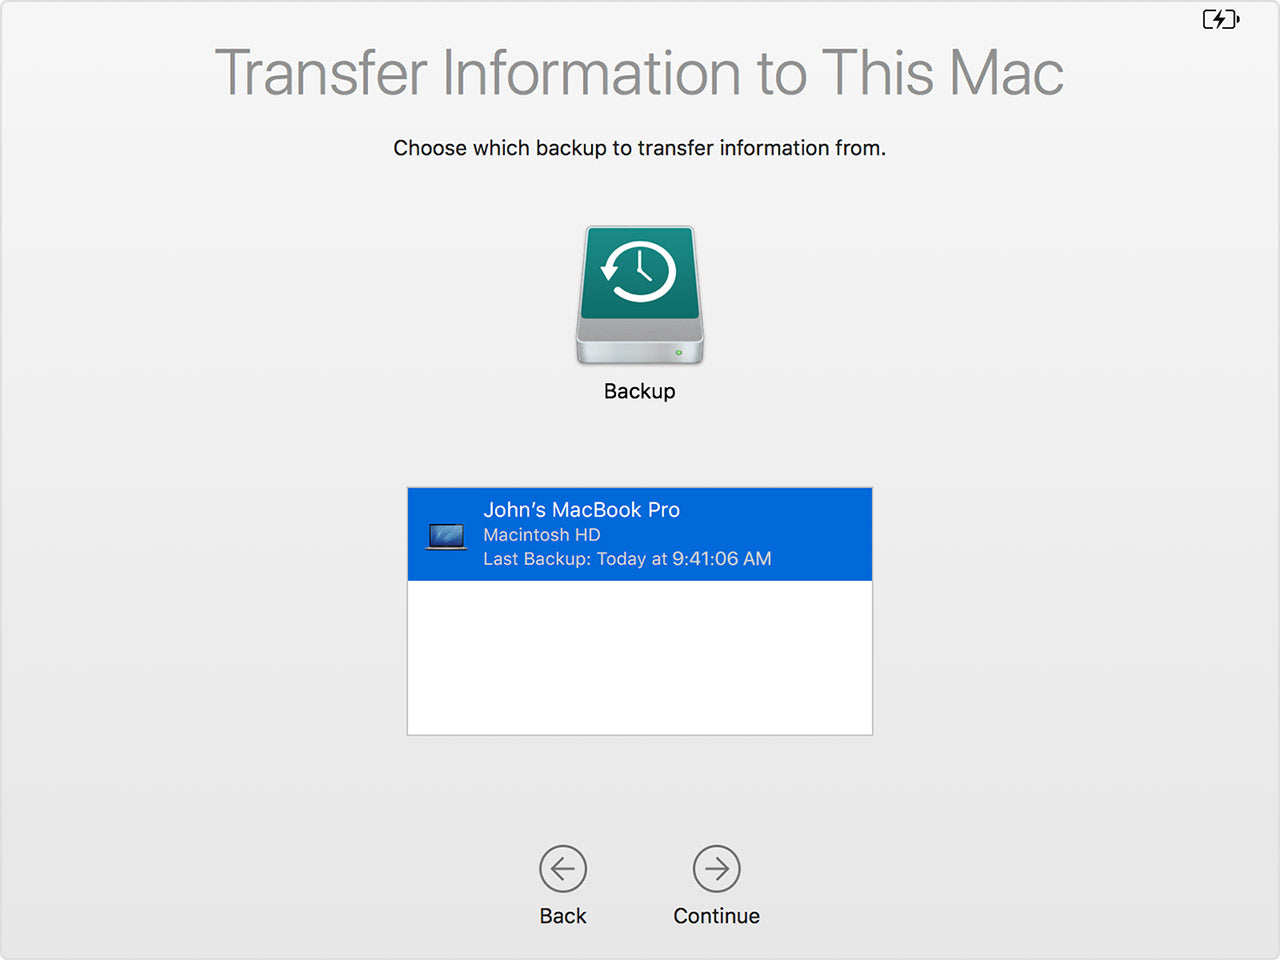
The instance in the prototype below, a Time Machine disk is connected and to exist used

Select the machine you want to restore from in Fourth dimension Machine
Then select the type of information you lot want to migrate
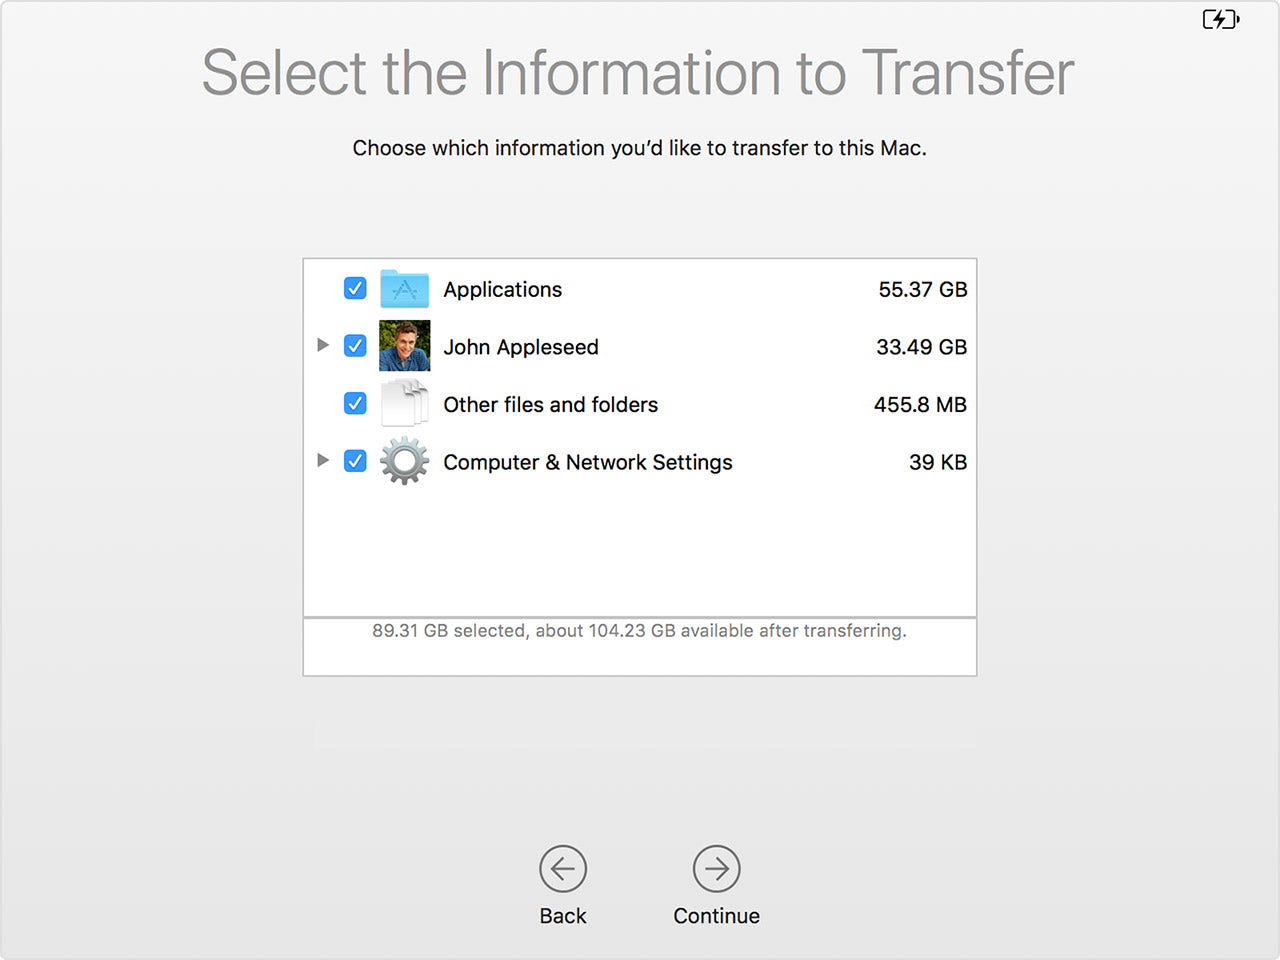
That is it! You should have a new macOS with all your applications and data restored back on the organization.
Limitations of Migration Assistant
The new Mac tin can not be on Lion (v10.eight) or earlier. If you are migrating to an old version of OSX such as Lion, then you lot need to use some other method.
This method is non recommended if the macOS are too far autonomously in release. It is ok if you are moving from Sierra to High Sierra. Only if your computer is on Lion, your application and cadre system files will not exist compatible with High Sierra or Mojave.
Time Car: the Good, the Bad and the Ugly
We take renamed this department the good, the bad and the ugly. These are the undocumented or lilliputian known Time Machine features that can brand your life easier or harder when upgrading to an SSD.
THE Adept
First the most asked question we go: Does Time Machine back up the operating system or macOS?
If your Time Machine is backing upwardly your whole bulldoze, aye the macOS is backed up. You have a complete support of your Mac. Y'all do not accept to download macOS to utilise your Time Machine. In Sierra and Loftier Sierra we accept seen Time Machine go off to the Apple website to verify or update core files. It is not totally understood what is happening, but it is not uncommon for Time Motorcar to go additional files from the Apple tree website before restoring a Time Motorcar back up. Usually these files are to do with the recovery sectionalisation on the Time Machine or the Disk Utilities page.
Restore on a new macOS
You can install a new macOS onto your Mac and and then restore a Time Car fill-in and non overwrite the new macOS. In our tests, nosotros have plant Apple has separated out the Bone and the data. If Time Auto sees there is a macOS installed on the SSD, information technology will not overwrite these files, but merely restore the data. You can enjoy a new macOS on your new SSD, and then restore your data without affecting the new macOS.
This is good for customers with High Sierra/Mojave on Extended Journal formatted drives. Yous can reinstall High Sierra/Mojave on a new SSD with APFS format, then restore from Fourth dimension Car and you will keep the APFS format, have all your data moved over.
The bad is for customers that have installed an older macOS, such as King of beasts, via internet recovery. If you and then restored from Time Machine on tiptop of this Lion macOS then Time Car will not overwrite the Panthera leo files, and y'all will create a Mac that tin non kicking on the new SSD. If y'all install the wrong macOS on your new SSD, the SSD must be erased using Disk Utility, and and so the Mac can be restored from Time Auto.
Rebooting off Fourth dimension Motorcar
Time Auto does not have a recovery partition, however you can use it to restore your Mac or install a new macOS. If you want to use Time Machine in this way, plug the Fourth dimension Car into the Mac, so restart the Mac holding down the Option key. This loads the boot manager and you can see all drives attached to the Mac. The Time Automobile should display as an external bulldoze. Select it and the Mac will build a macOS Utilities page that will have Disk Utility (to initialise a new drive or erase a current drive) and install a new macOS.
THE BAD
The biggest issue we currently have with Time Auto is restoring onto a new SSD with High Sierra or Mojave. We have written nearly this before: to run High Sierra or Mojave on an SSD without issues the SSD must exist formatted to APSF, non macOS Extended Journal. If you accept a mechanical hard bulldoze and have upgraded to High Sierra or Mojave, most of the time this drive is formatted as Extended Journal. When you restore from Fourth dimension Machine onto a new SSD, Time Machine recreates the whole structure. It volition proper noun the SSD the aforementioned as the old difficult drive (fifty-fifty if it is preformated and named different) and it will format the drive as the same every bit the one on the Time Auto, which is normally Extended Journal. There is no way to change to APFS without erasing the SSD. This is the problem. Currently we accept two work arounds. The easy one is clone the drive do not restore from Time Machine. By cloning, you can format the new SSD every bit APFS, and so the clone will re-create all the quondam files onto the new SSD with the right APFS format. The second work around is installing a fresh Os using a macOS installation USB and and so restoring Fourth dimension Machine on top of the new OS. Time Car will restore the information but not overwrite the new OS.
THE UGLY
This one might exist a bit pedantic merely it annoys the hell out of me. When you lot restore from Time Auto information technology restores everything including the disk name. Information technology is the disk name duplication that kills me every fourth dimension. You erase your new SSD, requite it a clever name like Ernie because your electric current hard drive is called Bert. You lot restore from Fourth dimension Motorcar and the SSD is now called Bert. What happened to Ernie? Ok, I know, you can go and rename the drive to Ernie only what if this is a second drive. Both drives are called Bert, how exercise y'all know which one is which? It is important, considering you need to set up the new SSD as the starting time disk in preferences. You can not rename the drive in disk utilities but you tin can change the name on your desktop. So go to the desktop, you will see two drives, both with the aforementioned name. You can click twice on the name slowly and information technology will highlight so y'all can rename it. Then go to Deejay Utilities meet which drive you changed. Y'all should be able to run into details like SSD brand name, which will get in obvious which is the new SSD. That style you tin can piece of work out which is the new SSD and which one should be renamed Ernie.
How to create a macOS USB
There are a lot of options to create bootable USB to install macOS. We have recommended Diskmaker X in the past but the method we outline here is the recommended method from Apple tree.
This is our summary of how to make a Mojave macOS USB drive. With this bulldoze y'all can install macOS on a blank SSD or boot from this USB and use the tools and utilities to cheque or format a Mac drive.
one
Download Mojave
Go to the App Store, search for macOS Mojave and download. For High Sierra click hither. Afterwards information technology has downloaded information technology should announced in your Applications as "Installer MacOS". If you lot have already downloaded and upgraded to Mojave or High Sierra you will need to download the MacOS you lot desire again (Apple deletes installer once it has been used).
2
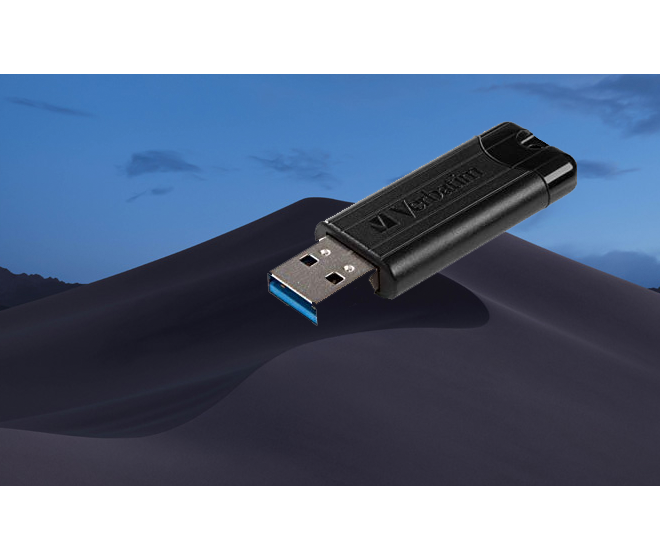
8GB USB
You need at least an 8GB USB bulldoze. It does not take to be a super fast USB three.0 version, and older one can exist repurposed. It does non take to be a USB. You tin employ an external difficult drive (note: any data on the bulldoze volition exist lost as it gets formatted). Go into Deejay Utilities and rename the USB to "upgradeable". Yous can erase and rename. The MacOS cosmos method will reformat the bulldoze, so it does not need to be any specific format type like Fat32 or Mac Journaled. What is important is the proper name of the drive, as information technology is used in the code below.
three
Using Concluding
Nosotros are going to employ the control line app called Terminal to create the MacOS drive. Don't worry if you accept never used it, information technology is very easy, non that scary. Open Last, it is found in the Utilities folder in Applications.
4
Copy this code
Copy this code:
sudo /Applications/Install\ macOS\ Mojave.app/Contents/Resources/createinstallmedia --volume /Volumes/upgradeable
5
Paste the code
Paste the code y'all copied into Terminal and hit enter. It will ask for your organisation password (unremarkably the i you log on with at start up). Type Y and return when it asks if you want to erase this drive. When it is finished creating it will brandish "Copy consummate". Y'all can shut Terminal.
6
How to use the USB
When the USB or external drive is plugged in, restart the Mac holding down the Selection primal. The USB volition appear on screen as Install MacOS. Select and hit render. You lot do not need to select a network. If you are installing the macOS on a new SSD it volition need to exist initialised. Go into Disk Utility, Erase and name. Proceed to install macOS. Please annotation Apple tree have added a new format type in Loftier Sierra and Mojave. If you lot are starting with a new macOS, like Mojave, and then Apple recommends you utilize APFS and not Mac Extended Periodical. APFS is a new format specific designed for Loftier Sierra and above macOS and optimised for SSD drives.
How to initialise an SSD
When you lot get your new SSD it is uninitialised. This means it tin can exist used in a Mac or PC. Information technology needs to be initialised before use. In the PC earth they telephone call this formatting the drive. In the Mac world it is called Erase and it is a function of Disk Utilities
Deejay Utility is a tool included in many places. Information technology is found in the Utilities directory in Applications. It is included in whatsoever macOS install app. It is found in the recovery partitioning on a bulldoze when a Mac is restarted holding down the keys Control + R. Information technology is too a part of the Cyberspace Recovery boot up. There are many reasons why y'all would want to erase a drive, this guide is focused on initialising a new SSD, however for readers who are looking at general data we have added the following warning...
Alarm: Erasing a disk volition delete all data on the disk. Never initialise/erase a drive that has data on information technology that you want to go along. I know that sounds obvious but y'all would be surprised with the support calls nosotros get :-). Four steps to initialise a new SSD.
New APFS format in High Sierra and Mojave
Starting from macOS High Sierra, Apple have a new format called APFS. It is recommended to format your new SSD in APFS if you will be using High Sierra or higher up. APFS is optimised for SSD drives. If you lot are using macOS Sierra or below, the recommended format is still Mac Bone Extended (Journaled).
1
Open Disk Utility
When you start Disk Utility, in the sidebar are the drives attached to the Mac. Select the disk proper noun, not the indented volume proper name.
two
Erase button
Click on the Erase button. If at that place is no erase push select the bulldoze once again.
iii
Options
At that place are ii to three fields that need to be selected.
Name: Enter a proper noun for your disk, such as "Macintosh SSD"
Format: Cull APFS (for High Sierra or Mojave) or Mac OS Extended (Journaled) for before macOS like El Capitan
Scheme (if available): Cull GUID Partition Map
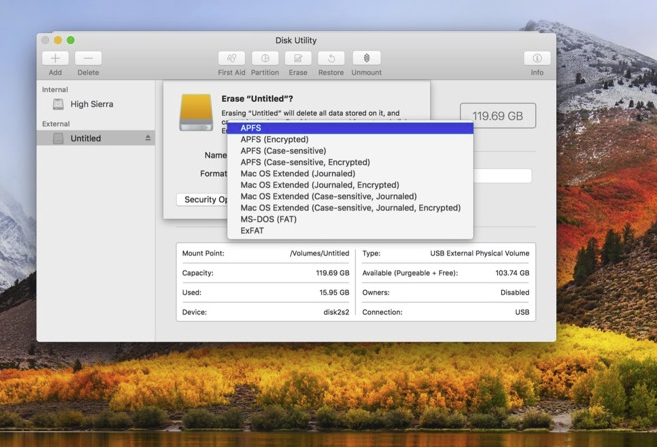
4
ERASE
Click the Erase button and the SSD volition be set up to use.
How to clone with SuperSuper!
Delight note: this process cannot exist used to clone a Windows partition created by Boot Camp. We recommend WinClone by Twocanoes Software. Information technology is commercial software requiring a license to utilize, all the same information technology is non affiliated with our company and that is not an affiliate link.
Before cloning, the SSD needs to be initialised, if that has not been done, please follow our instructions above.
The process is really only 2 steps...download and run. Superduper! is very unproblematic merely powerful piece of software.
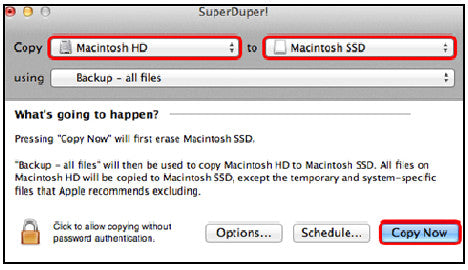
i
Download and install
SuperDuper! software by Shirt Pocket (complimentary download).
When the download is complete, install in your Applications binder.
Double click on the SuperDuper! icon to run
2
Clone
Choose your source (Macintosh HDD) and destination (Macintosh SSD) drives. Click Copy Now to brainstorm. You will be notified when information technology is complete.
Simple Questions answered
Is the SSD the same concrete size as my current hard drive?
Yes. The standard Apple Mac Mini 2006-2012 difficult drives are an manufacture standard two.v inch notebook drive. They are physically exactly the aforementioned physical size.
Can I use any SSD hither to upgrade my 2014-2019 Mac Mini?
No. From 2014 the Apple Mac Mini SSD was a proprietary NVME SSD. The 2019 Mac Mini SSD was soldered onto the motherboard and can not be removed or upgraded.
Does the 2014 Mac Mini use a standard Thousand.two SSD?
No. It is only standard in it'due south physical size. A standard M.2 bulldoze will non work. Apple tree has fabricated their drives proprietary.
Are the 2.v inch SSD drives faster or better the larger the size?
All our current SSDs are the aforementioned speed and quality. The 250GB is equally fast as the 2TB.
Practise I need a bracket to install the SSD?
No.
Can I do this install myself?
Yes. We have had customers of every type of experience: students to pensioners exercise this upgrade. It is just slightly more than complicated than a RAM upgrade.
Do I need any special tools?
For the pre 2013 models you need a small phillips screwdriver and a Torx 6 screwdriver. These are standard tools, constitute in many kits and available at hardware stores like Bunnings. Everything you need is in our screwdriver tool kit. The Aura SSD kits include all the tools you require.
Tin I clone a bigger drive onto a smaller SSD?
No. If you have 900gb of data on a 1TB hard drive, you can non clone this onto a 525GB SSD. The cloning software we recommend does non selectively clone. It is all or nothing.
Does the hard drive and the SSD have to exist the same size?
No. Every bit long as the source (current difficult bulldoze) has less data than size of the new SSD. Then 300GB on a 1TB hard bulldoze will clone onto a 525GB SSD.
What size SSD should I buy?
Nosotros recommend you look at how much data is on your hard drive and then get an SSD at least 20% bigger than the data you take. Nosotros have found the optimal gratuitous infinite for an SSD to work with virtual and bandy files is 20%. Aim for 30 to 40%. It all depends on your work period and how much information you store and delete.
Can SuperDuper! clone a windows parition?
No. We recommend Winclone for this blazon of clone.
Free PDF Guide
Dont have fourth dimension to read information technology all now?
Need a PDF for reference?
Sign upwardly for an account and download every guide for costless

Mac Mini 2014 Ssd Upgrade Kit,
Source: https://www.upgradeable.com.au/pages/mac-mini-ssd-upgrade-guide
Posted by: vosesurialts1950.blogspot.com
0 Response to "Mac Mini 2014 Ssd Upgrade Kit"
Post a Comment